When in Denmark: Kanelsnurrer
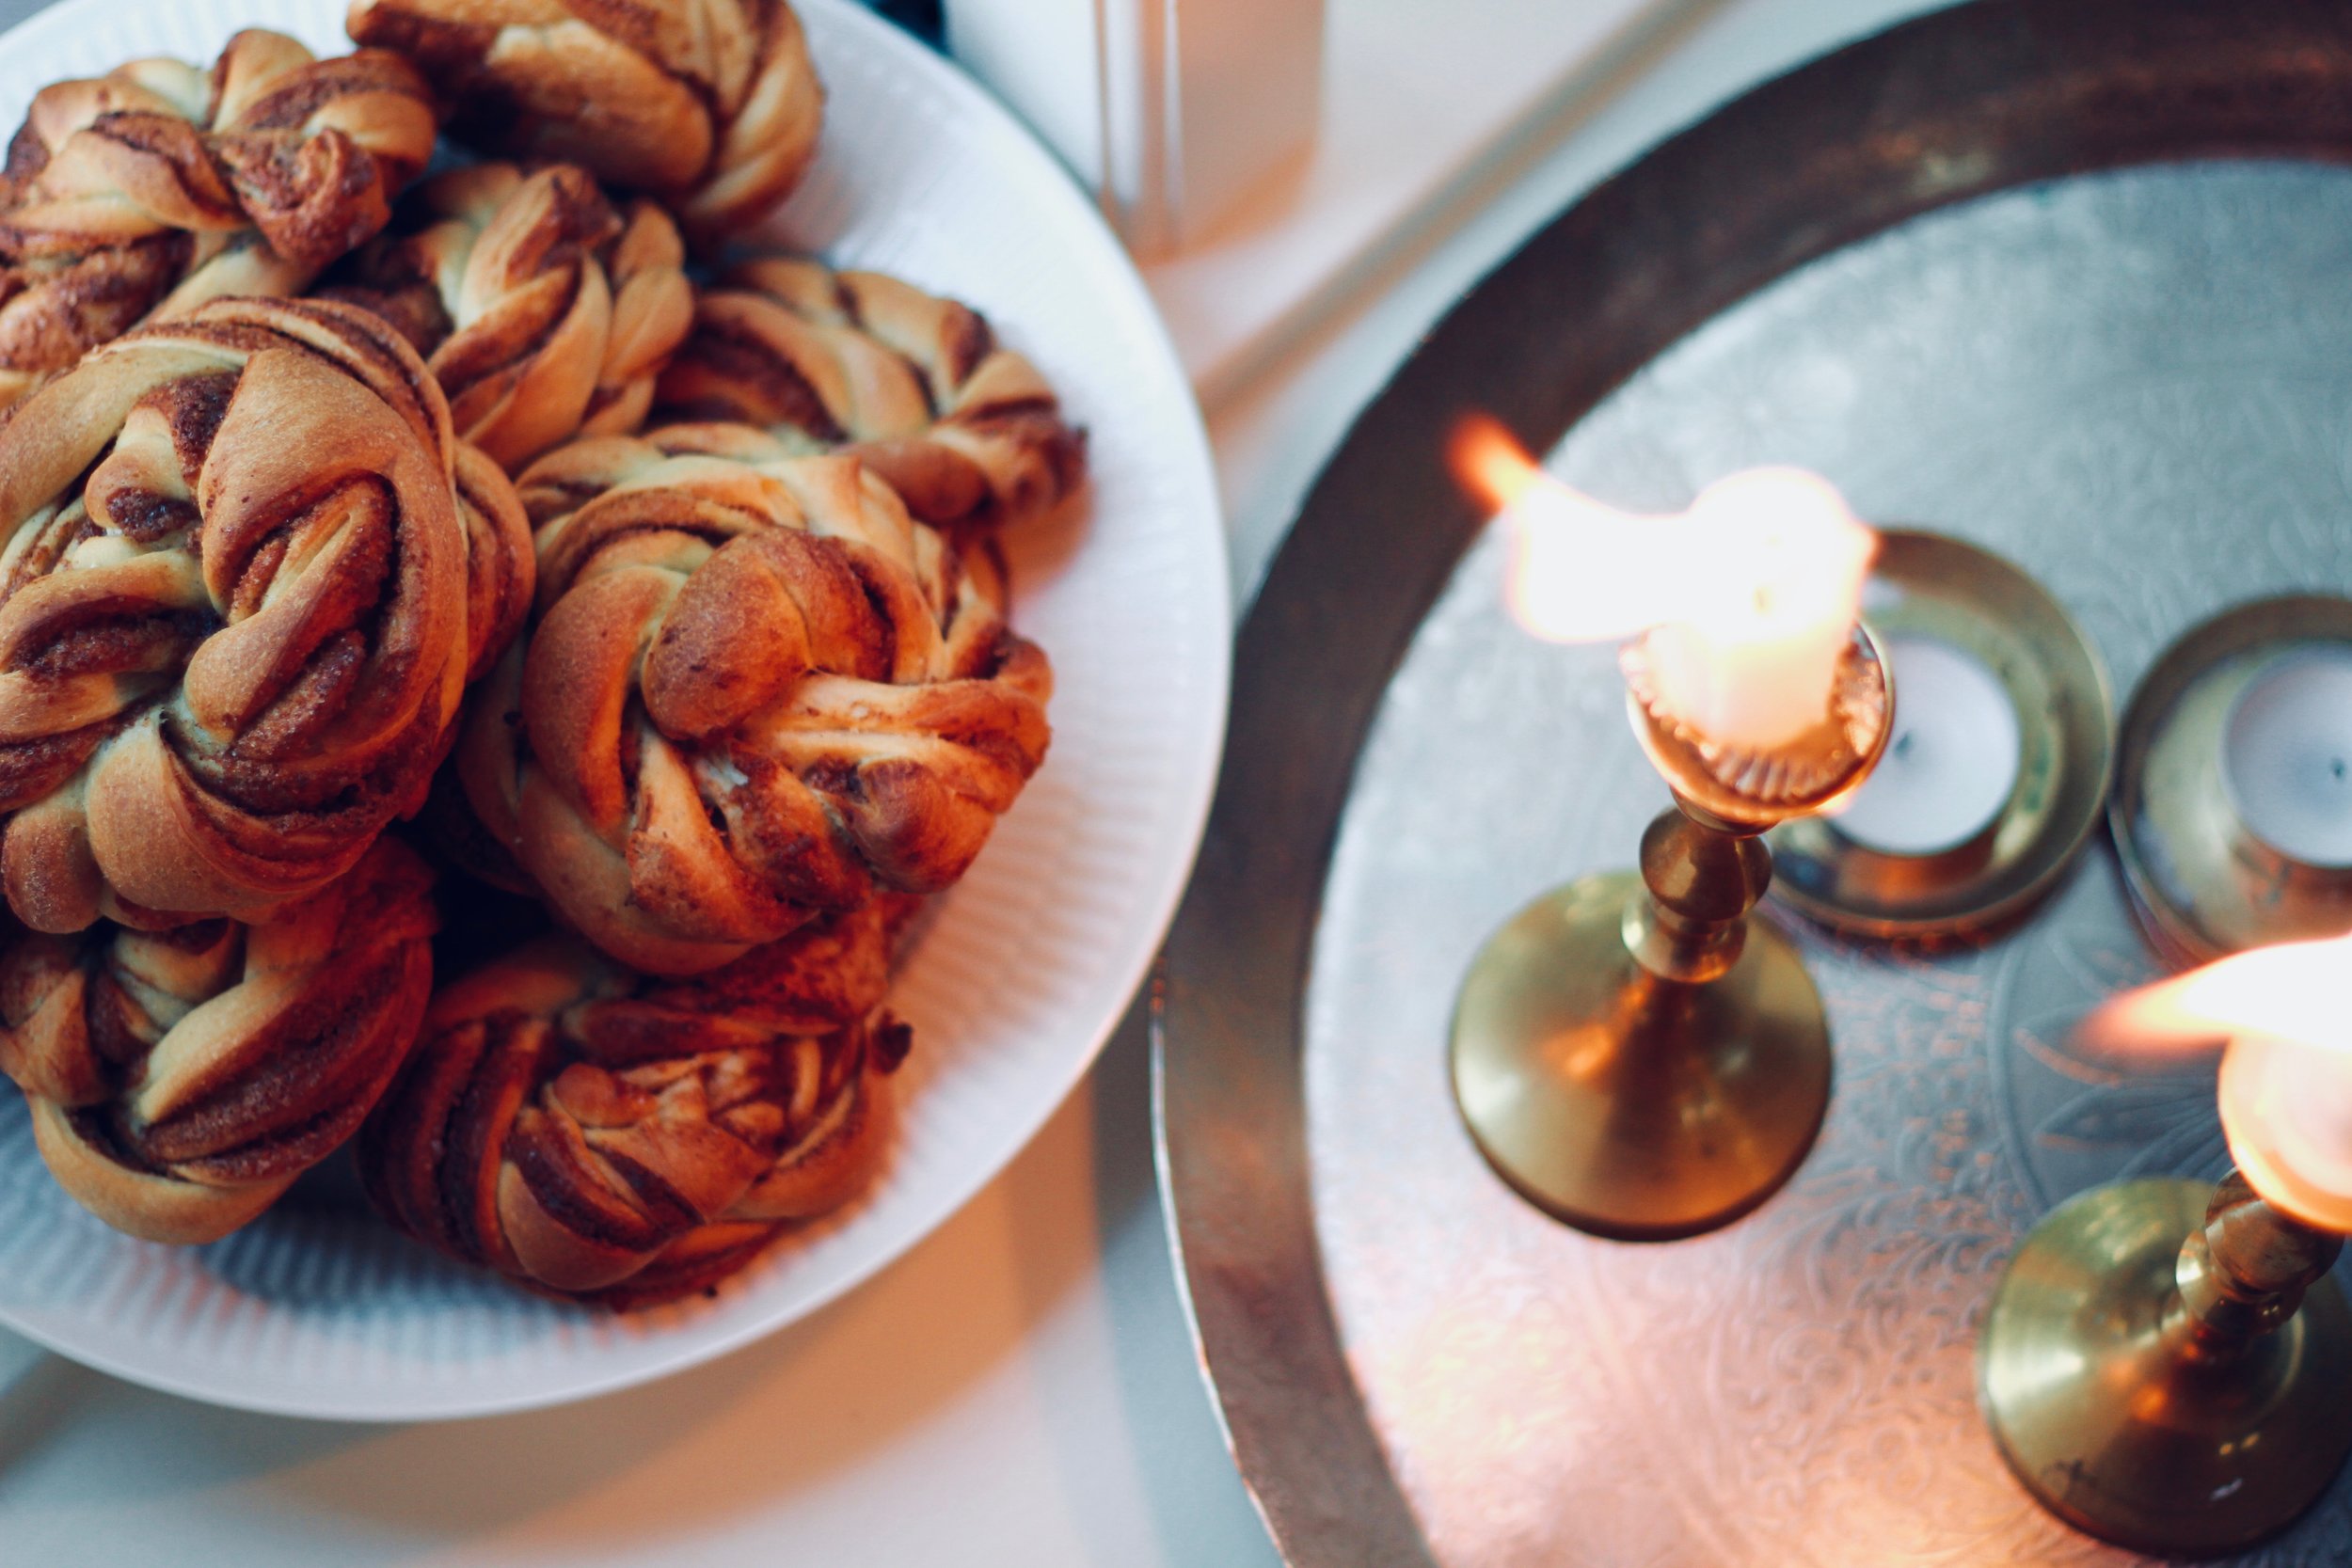
Aarhus, Denmark... Where do I begin? For starters, it's a foodies heaven and an artist's sanctuary. The city is rich in culinary marvels including the most delicious breads and pastries imaginable. Among my favourites, Nummer 24 and La Cabra rank among the highest. Both sitting conveniently just doors down from one another (my metabolism cursing me for that very reason), so there's no way to really miss them. This year I decided to take on a little project of making a few Danish recipes, because as they say when in Rome, do as the Romans.... the very first on the list naturally was Kanelsnurrer filled with cinnamon, cardamom and marzipan. Now I was a bit hesitant to give them to our Danish friends here, worried that they would disregard my attempt as utterly touristic (insert sad face here). However, the results rung a different bell... they loved it! So much so, that more rolls were requested (I think I passed the "tastes like my mother made this" test). I find this recipe the perfect balance of dough (just doughy enough) and aromatic sweetness. I must say, I don't identify with much of a sweet tooth but I do enjoy a good European pastry. So go ahead, give it a try and then proceed to convince yourself you need to move to Denmark, because I'm right behind you. Lad os begynde!

Kanelsnurrer: Danish Cinnamon, Cardamom and Marzipan Twists
Once again I have lost the source of this recipe. However, if I ever do come across it again I will surely update this section.
Ingredients:
Dough
22g fresh yeast
250 ml whole milk
80g unsalted butter
1 tbsp sugar
1/2 tsp salt
1 tsp ground cardamom
1 egg
650g all-purpose flour
Filling
80g unsalted butter, softened
90g brown sugar
75g marzipan
1/2 tsp pure vanilla powder (1 tsp vanilla extract)
1 tsp ground cardamom (more/less depending on personal taste)
Directions:
1. Warm up milk and butter (for dough) in a small sauce pan, until butter is just melted and let cool until you can leave your finger comfortably for a few seconds. Crumble fresh yeast in a large bowl and then add the milk and butter mixture. Gently stir until yeast has dissolved. Add sugar, salt, ground cardamom and egg and gently whisk until uniform.
2. Slowly add flour, stirring with a wooden spoon every time more flour is added. This step is important, if you add the flour all at once you risk the possibility of using too much flour thus resulting in too dry of a dough (I used just around 600g of flour and added more during kneading ). There is no pressure to use all of the flour suggested if you feel that your dough is good enough; it should be a little bit sticky. Continue by kneading the dough for 10 minutes. Place dough in a lightly greased bowl, cover with a tea towel and let rise for 1 hour.
3. While your dough is rising, start making the filling. Either add all the ingredients to a food processor until a uniform paste forms or use a fork and break the ingredients down and mix in a bowl (a little more energy needed for this route).
4. On a lightly floured surface, roll out the dough into a roughly 12in x 15in rectangle. Evenly spread filling over the surface of the dough, making sure to get the edges as well. Fold over the dough as if you're folding a letter to go into an envelope (imagine evenly dividing the dough in three sections and folding them over each other). Roll dough out once more to thing out the dough back to a 12x15 inch rectangle. Cut dough into long strips about 1.5 inches, should make 10-12 strips. Slice each strip down the middle once again, only stopping with 1inch left at the end. Hold down the uncut portion and twist the two strips together. Still holding down the uncut portion, twist around the rest of the dough around two fingers, forming a cone shape. Continue by feeding the end of the strip through the opening at the peak of the cone. Place on a sheet pan lined with parchment paper, once all are done let them rise for another 45 minutes.
5. Bake at 200C/392F for 15-20 minutes or until golden brown. Let cool and enjoy for breakfast with coffee or afternoon tea!
Notes:
- I'm a filling person... most definitely. However, I liked the dough to filling ratio. If however, you like a bit more of a gooey inside, you can surely double the filling recipe and cook for a little longer.
- If you are having difficulty achieving the twists to look desirable, I have linked a site that has demo for your guidance. The website is entirely in Danish but if you scroll to the bottom of the page you will see images with a step by step process. Click here for the demo.